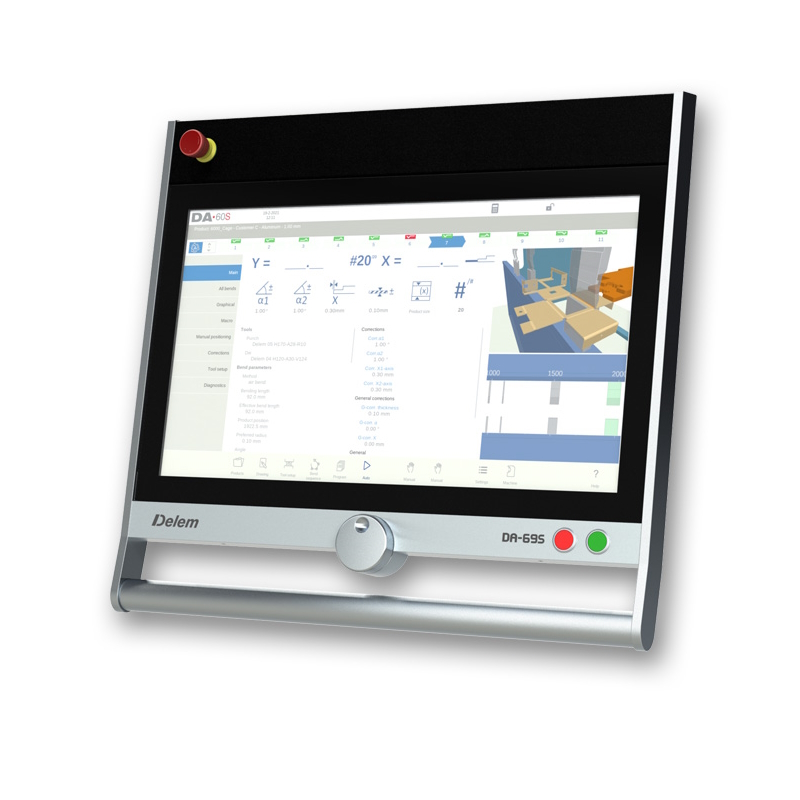
DA-66S offers 2D graphical programming with 3D machine representation; DA-69S adds 3D graphical programming. A 3D view is not the same as a 3D programming workflow.
Planning guidance for buyers and trained teams. Follow the supplied machine and tooling manuals, approved procedures and safeguarding requirements. This is not an operating or commissioning manual.
Separate programming from visualization
When comparing Delem DA-66S vs DA-69S, do not make the decision from screen size alone. Both are listed with a 24-inch display. The main distinction is the way parts can be programmed: Delem describes DA-66S as a 2D graphical programming control, while DA-69S supports both 3D and 2D graphical programming.
DA-66S still includes 3D machine representation in simulation and production. Calling it “2D only” without that distinction is misleading. Similarly, seeing a three-dimensional machine on a demonstration screen does not establish that the controller supports the same part-creation workflow as DA-69S. Sources: DA-66S and DA-69S manufacturer specifications.
Compare the exact model—not just the brand
| Compare | DA-66S | DA-69S |
|---|---|---|
| Graphical programming | 2D | 3D and 2D |
| 3D machine representation | Listed | Listed |
| Display | 24 inches | 24 inches |
| Listed offline software | Profile-S2D | Profile-S3D |
These are product-level descriptions, not the final BENDRYX bill of materials. Confirm software delivery, licenses, machine models, interfaces and training with the quotation. Neither label independently establishes the backgauge layout or installed angle-measurement hardware.
Existing shops may also encounter DA-66T and DA-69T. Keep the full suffix in every comparison: S and T are different product families. Our Delem control library keeps those variants separate instead of treating every “66” or “69” as interchangeable.
Start with where programming actually happens
If operators mainly create straightforward profiles at the machine, discuss how quickly they can enter the drawing, identify tools and review the planned job. If engineering prepares complex parts away from the machine, demonstrate the entire office-to-machine process rather than only a finished simulation.
For example, a shop producing many related brackets might value consistent tool records and clear revision handling more than an impressive demonstration of an unrelated enclosure. A shop with changing three-dimensional assemblies may instead need to evaluate the additional programming workflow directly. These are buying scenarios, not guaranteed productivity results.
In either case, include the people who will program and operate the press brake in the review. A workflow understood by one demonstrator is not yet a repeatable process for your team.
Use the same representative job in both demonstrations
Prepare a comparison brief before asking for a demonstration. Use the same drawing revision, material description and intended tooling so that differences in the part do not obscure differences in the control.
- Start from your normal input. Ask what file formats and preparation steps are supported by the quoted software.
- Review the tool records. Confirm how the proposed punch, die, holders and machine geometry are represented.
- Follow a revision. Ask how a changed flange or drawing revision reaches the released job.
- Check the handover. Have the operator explain what identifies the approved program and setup.
- Inspect the result. Evaluate a representative first part under the supplier’s approved procedure, not just the screen animation.
A simulation relies on its model and data. It does not replace machine-specific verification, safeguarding or operator training.
Buy a documented workflow, not a feature label
Request the exact control name, offline software scope, machine/postprocessor compatibility, agreed training and the route for support. If you intend to share programs among machines, get the compatibility conditions in writing rather than assuming files transfer unchanged.
Delem is an optional BENDRYX control choice by configuration; ESA S840 W remains the starting platform for applicable machines. We can review your existing programming environment without assuming one brand is right for every shop.
A useful decision: choose the workflow your parts need and your team can maintain. Document how a drawing becomes an approved setup, who releases changes and what remains to be checked at the machine.
Put the guide to work
Build the right package around your parts.
Share your drawing, material, tooling and production requirements. BENDRYX helps customers in Canada and the United States define a machine-specific scope before ordering.
Discuss a Delem control package →Technical references are linked beside the relevant discussion. Examples and checklists are BENDRYX planning guidance, not manufacturer-approved settings or performance guarantees. Product information reviewed September 29, 2026; the final signed technical schedule takes precedence.